Try the new IKO website at https://beta.ikointl.com/
Help< > Standards
Author: Marica Moda
Equipped for any kitesurfing adventure
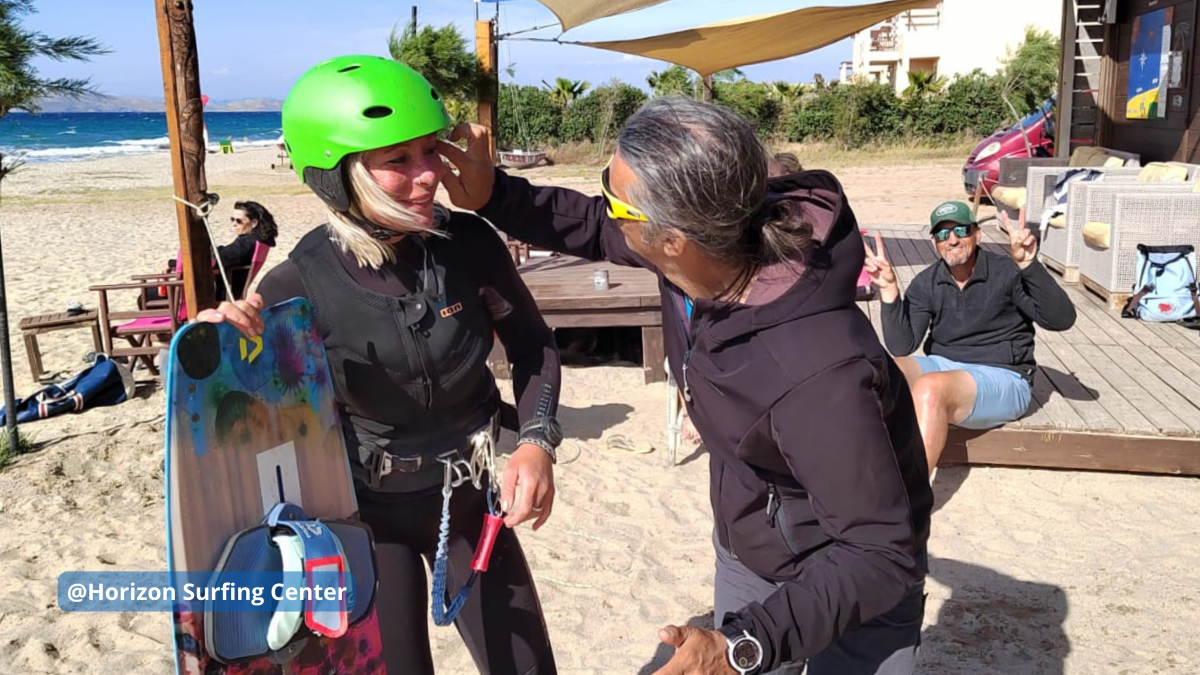
Kitesurfing is pure adrenaline, but like any sport, it carries risks. The proper safety equipment in full working order ensures safe and enjoyable kitesurf sessions; these are good suggestions that IKO wants to give you.
Helmet: Make a Difference by Wearing One.
Ever heard that "helmets are uncomfortable and only for beginners"? It's time to dispel that myth! Your helmet protects you from falls and collisions, whether the water is flat or wavy. Think of the helmet as a shield, like your cell phone cover. It protects you from the sun and defends you during unexpected falls or collisions with the water, your board, or other kiters or obstacles. Kitesurfing helmets are lightweight, comfortable, and designed to withstand hard impacts. They are equipped with drainage holes to prevent the chin strap from causing breathing difficulties underwater and help keep your head afloat if needed.
Helmets are cool and customizable! You can choose vibrant colors, add stickers, or design it to reflect your style. Remember, there's nothing more important than protecting your head. Wear your helmet proudly, just like the pro riders do. Be ready for any adventure.#wearahelmetlikeapro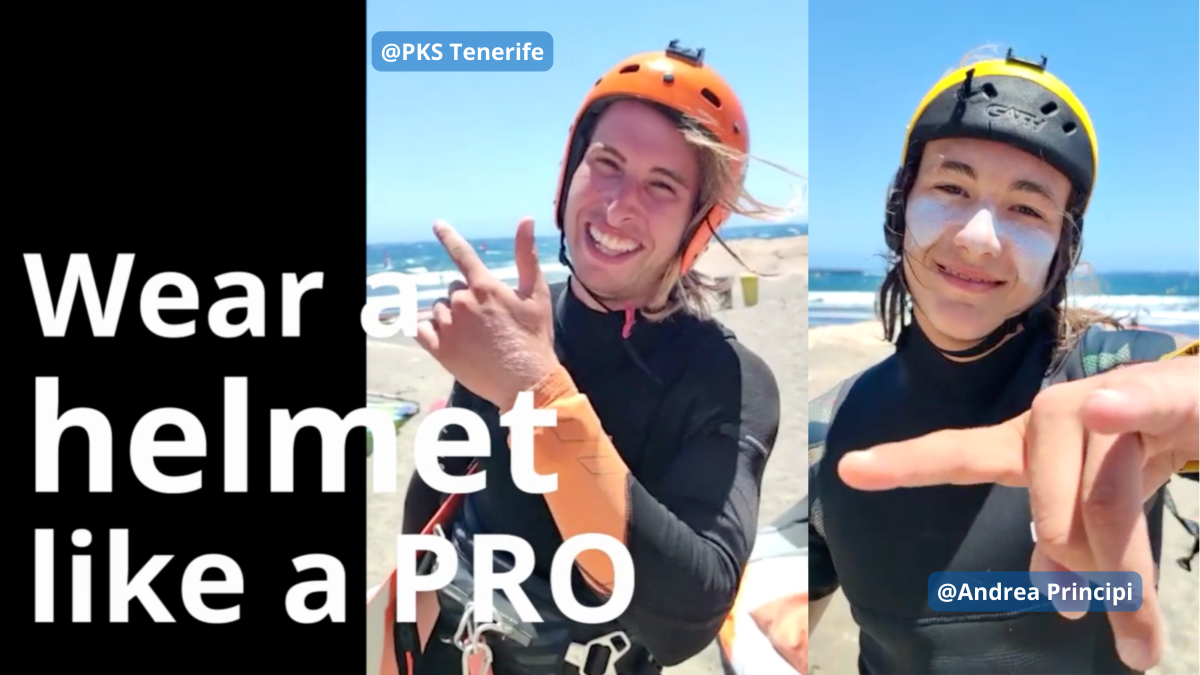
Check out the video on the IKO YouTube channel.
Buoyancy Aid (50 N): Your Protection of Safety
Wearing a buoyancy aid with 50 Newtons (N) during kitesurfing lessons is mandatory when learning with an IKO instructor. This is crucial for your safety. Even in shallow water, unexpected falls can occur. A buoyancy aid keeps your head and torso above water, allowing instructors and rescuers to assist you easily in need.
Impact Vest: Everyday Buoyancy Aid
An impact vest provides more agility but less buoyancy compared to a 50 N buoyancy aid. It is called an "impact" vest because it protects you from impacts during falls. While it offers some buoyancy, its primary function is to protect your torso from impacts during jumps, freestyle, or advanced maneuvers with a higher risk and probably hard falls, reducing injuries.
Make sure your vest is well-fitting and comfortable. It should allow you to breathe well without overtightening your rib cage and provide full mobility. This ensures you can perform all maneuvers without feeling restricted.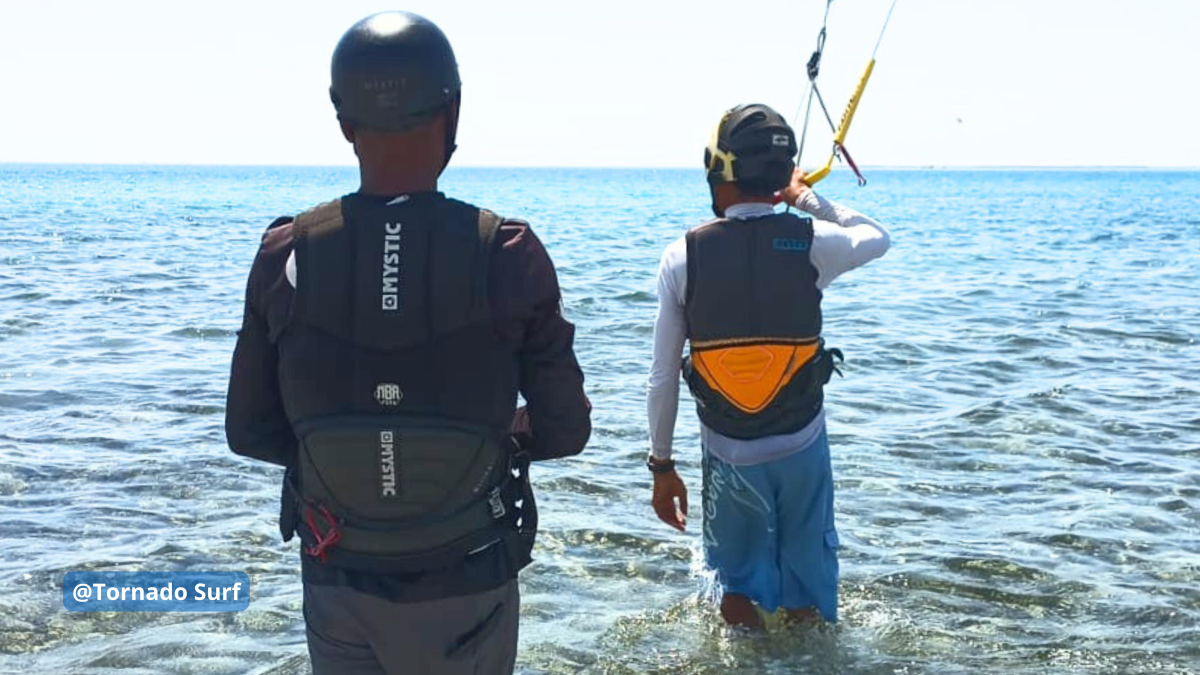
Kite Leash: Your Inseparable Companion
The kite leash is a crucial piece of safety equipment in kitesurfing. According to IKO standards, attaching the kite leash to the front of your harness is essential. This ensures you can easily reach it with both hands in an emergency. Fastening it behind or to one side of the harness can pull you backward or sideways, making it hard to reach the quick-release system.
Attaching it to the front ensures the quick-release system works properly and doesn't snag on your harness hook. Always test the kite leash before entering the water to ensure it is not blocked by salt or sand, including the quick release of the chicken loop. It's better to know it works before you enter the water than to find out in an emergency.
Kite Line Cutter: Your ace in the hole
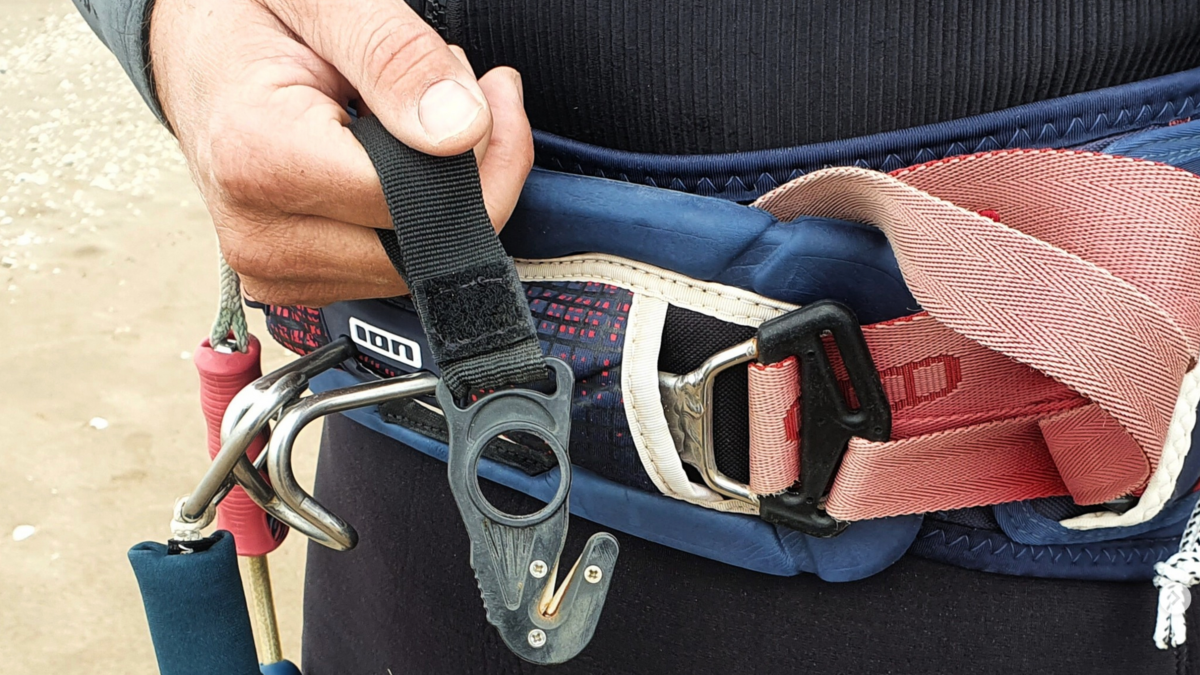
IKO recommends having a line cutter as part of your safety gear. Keeping it on your harness can turn a dangerous situation into a story to share with friends on the beach at sunset. It’s an investment in safety for you and other kiters in case someone gets tangled in the lines. Be aware that not all harnesses come with a line cutter included. Check your harness to see if it has one, and if it doesn't, make sure to get one separately. Regularly ensure the blade isn't rusted, just as you check your phone's battery before leaving the house.
To prevent the blade from rusting, cover it with candle wax. This will protect the blade from water, salt, and sand, but it will also ensure that if you need to use the line cutter, the wax will quickly come off, allowing the blade to work effectively.
#BeSmartBeSafe
Equipping yourself with the must-have safety gear is about following guidelines and embracing a preparedness mindset and respect for the sport. Your helmet, buoyancy aid, impact vest, kite leash, and line cutter are critical in safeguarding your kitesurfing adventures. They turn potential hazards into manageable risks so you can focus on the excitement of your kitesurfing session. Each item is designed not only to protect but also to enhance your overall kitesurfing experience.
Next time you go kitesurfing, wear your helmet with pride and your buoyancy aid or impact vest confidently, and check that every piece of your equipment is in top condition. You protect yourself and set an example for others in the kitesurfing community.
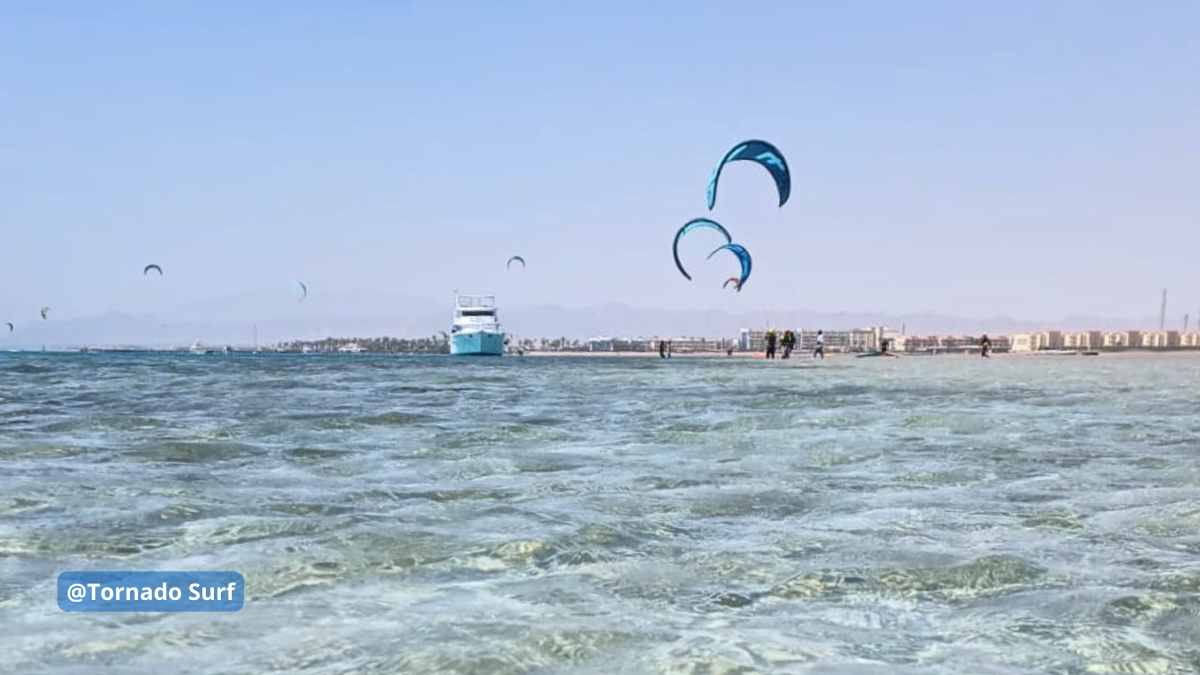
Stay safe, ride hard, and make every session an epic adventure.+
Happy kitesurfing!
#wearahelmetlikeapro #StaySafe #KiteSmart #SafetyFirst
For more tips and safety guidelines, visit the IKO YouTube channel: @IKOintl
Author: Marica Moda
How IKO Instructors Can Convert Their Certification with OPES (Organization for Sports Education) Recognized by CONI (Italian National Olympic Committee).

Guide to Converting IKO Kitesurf Instructor Certification to OPES/CONI Certification - Sailing Instructor, discipline DV005 - Kiteboarding, according to the requirements of the National Sports Qualifications System SNaQ.
IKO assists you in navigating the steps to obtain the dual certification IKO - OPES/CONI and pursue the profession of Kitesurf Instructor in Italy.
Why obtain the dual certification IKO - OPES/CONI?
The conversion opportunity is open to all certified kitesurf instructors, whether Italian or foreign, working in Italy. Its aim is to improve the quality of sports education and ensure greater professionalism and economic fairness in the world of kitesurfing.
This dual certification ensures that kitesurf instructors have the necessary skills to teach effectively and safely, offering the opportunity for regular employment within sports associations and/or kitesurf schools, and ensuring stable income and associated labor rights.
CONI, OPES, and IKO together in Promoting Sports in Italy.
The Italian National Olympic Committee (CONI) is the national body responsible for the promotion and organization of Olympic sports.
OPES (Organization for Sports Education) is a sports promotion organization recognized by CONI. It collaborates closely with CONI and international organizations like IKO (International Kiteboarding Organization) to promote physical education and sports in Italy.
OPES is committed to converting IKO Kitesurf Instructor certifications to OPES/CONI certifications and recognizes the teaching provided by IKO as of a high standard. Thus, OPES enables the conversion of instructors' diplomas issued by IKO Examiners into OPES/CONI diplomas.
This collaboration is essential to ensure a professional and safe sports system for all.
Towards a Safer and Professional Sports Future: Optimism and Collaboration between IKO - OPES/CONI.
The goal is to improve the quality and safety of sports education in Italy, building a more solid and professional future for the kitesurfing world in Italy, in compliance with local regulations.
Thanks to the collaboration between IKO and OPES/CONI, the procedure for converting the IKO certification to OPES/CONI certification is straightforward, affordable, and can be carried out by all IKO Instructors wishing to work in kitesurf schools in Italy that are part of the same association.
Do you want to become an IKO Instructor and work in Italy? Here's how your IKO certification will be converted into an OPES/CONI certification.
The procedure to obtain the dual certification is as follows:
- At the end of the IKO course ITC (Instructor Training Course), the organizer will compile a form with the data of instructor candidates who have successfully completed the course, qualifying as IKO Kitesurf Instructors Level 1.
- The form will be countersigned by the course's responsible IKO Examiner.
- The form will be sent to the OPES central membership office, which will issue the certifications at a cost of €25.00 per diploma.
- All candidates who successfully complete the IKO Instructor Course - ITC L1 will receive the National Diploma as Kitesurf Instructor OPES/CONI - Sailing Instructor, discipline DV005 - Kiteboarding, according to the requirements of the National Sports Qualifications System SNaQ.
If you are already an IKO Instructor, Italian or foreign, and want to work in Italy, here are the steps to follow.

For already certified IKO Instructors who want to work in Italy, it is possible to directly request the conversion of their IKO Kitesurf Instructor certification from OPES/CONI, obtaining the National Diploma as Kitesurf Instructor OPES/CONI - Sailing Instructor, discipline DV005 - Kiteboarding, according to the requirements of the National Sports Qualifications System SNaQ.
The procedure requires filling out a form, paying an annual fee to OPES/CONI, and submitting the necessary documentation. Once the conversion is completed, the OPES/CONI certification will be issued.
The steps to follow are:
- Fill out the conversion application form downloadable from the IKO/OPES website. You can find the request form here: OPES/IKO Conversion.
- Attach your IKO Kitesurf Instructor certification to the email.
- Attach the receipt of payment of the annual fee paid to OPES/CONI, currently €15.00: payment to be made by bank transfer to O.P.E.S. - Organizzazione Per l’Educazione allo Sport - Via Salvatore Quasimodo, 129 – 00144 ROME.
- Cod IBAN: IT11L0538703208000001088781 – BIC/SWIFT: BPMOIT22XXX
- Banca Popolare dell’Emilia Romagna
- Specify in the reason for payment: "conversion IKO/OPES name and surname".
- Send all documentation to the following email address:
- OPES/CONI will issue the new certification.
It should be noted that the OPES/CONI equivalence applies only to IKO Instructors with a valid certificate. If the IKO certificate has expired, the OPES/CONI equivalence will not be valid, but you can attend an IRC course (Kitesurf Instructor Reinstatement Course) for reinstatement.
The agreement, in force since 2020, has an annual duration and is tacitly renewed in the following years.
The national contact person for OPES/CONI for maintaining relations with IKO is Andrea Frateiacci.
Some Italian IKO Centers offer certification conversion to their instructor candidates.
To facilitate instructor candidates, some Italian IKO Centers offer to cover the cost of converting the IKO - OPES/CONI certification for their candidates, including it in the cost of the professional ITC course (Instructor Training Course).
To ensure that the certification conversion is included, contact directly the IKO Center where you will attend the professional instructor course (ITC - Instructor Training Course).
Joint Commitment.

This collaboration represents a significant step towards a safer, more professional, and fairer sports future for kitesurfing in Italy.
This joint commitment to excellence in sports education reflects the determination to promote high standards in the sector, ensuring a professional and safe environment for all kitesurfing enthusiasts in Italy.
Do you really know how your kitesurf bar’s safety system works?
Author: Marica Moda
Kitesurf bars and safety systems, let's clarify.
Kiters at the beach often argue about which brand makes the best bar, what materials are used, and which safety systems work better than others.
But do you really know how your bar's safety system works? Did you simply rely on the shopkeeper, the owner of the kitesurf school that sold it to you, or the friend who recommended it?
How many kitesurf bar safety systems do you know?
Kite companies are always trying to innovate in equipment performance and safety. If you compare the performance and safety of kitesurf from its origins to today, we have made great progress.

We have moved from essential two-line bars with no depower capabilities and no quick releases to bars with depower systems, simple adjustments, and quick releases that can be used with one hand.
One of the most important features in the design of a kitesurf bar is the operation of the safety system.
Bar security systems: safe and unsafe.
First, it's necessary to clarify that no safety system can completely depower a kite, especially in high winds.
Some safety systems come very close to 100% depowering; that is why IKO recognizes and approves safety systems if they can release most of the kite's power in any wind condition (from very light to strong).
This occurs in bars with front re-ride or 5th-line safety systems and doesn’t occur with other safety systems on the market.
Approved by IKO: front re-ride security system.
It's one of the 4-line bar safety systems, most commonly used on LEI (Leading Edge Inflatable) kites, thus with the inflatable leading edge.
The safety line is one of the two front lines, and in order for the system to work, the bar must be able to slide along this line in the direction of the kite for a distance equal to at least one wingspan of the kite (in the graphic: d1 ≥ d2).
Once the chicken loop's quick release with the front re-ride system is activated, the bar will slide toward the kite on the front safety line, and the kite will instantly and safely lose most of its power.
Be careful not to have the front lines too tightly rolled together (related to jumps with rotation and kite loop), because this could still cause the security system to malfunction (in this case, use the swivel to keep them separated at all times).
The front re-ride system is the safest, which is why it’s IKO-approved, and fortunately, today, it's the most widely used by major kitesurf equipment manufacturers.
For the front re-ride system to function correctly and be approved by IKO:

d1 must be equal to or bigger than (≥) d2 (wingspan of the kite).
Approved by IKO: 5th line security system.
The safety line is a 5th line, connected to the center of the leading edge on LEI kites and the center of the trailing edge on foil kites.
For the safety system to work correctly, the bar must slide along the 5th line in the kite's direction for a distance equal to at least one kite string (in the graph: d1 ≥ d2).
It facilitates the relaunch from the water of a C-Kite, and some brands use it to ensure more excellent structural stability of the kite.
IKO approves it; however, the depowering is less than the front re-ride system, and the risk is that the 5th line wraps around the kite since it’s attached to the kite tow point (where the pump leash connects).
Activating the quick release of the chicken loop allows the kite to lose most of its power; still, you must be careful because, as mentioned before, the 5th line could wrap around the kite and damage it.
For the 5th line security system to function correctly and be approved by IKO:d1 must be equal to or bigger than (≥) d2 (kite chord).

NOT approved by IKO: OSR (Oh S**t Ring) safety system, asymmetric and mini 5th line.
Fortunately, few brands use these security systems, and IKO recommends that you never use them in any circumstances. If your bar has one of these security systems, we recommend that you change it to protect your safety and the safety of others.

The asymmetric safety system and the mini 5th line don’t totally depower the kite because once you activate the chicken loop’s quick release, they keep both front lines in tension, not allowing the kite to lose most of its power, risking also kite loops.
In the OSR system (fortunately, few are seen on beaches), the safety line is one of two directional lines (back lines). Even in this case, the system doesn’t allow total depowering of the kite, risking uncontrolled kite loops.
So, what is the best safety system for a kitesurf bar?
The best safety system is the FRONT RE-RIDE, and it’s 100% IKO-approved.
On bars with the front re-ride safety system, you can find the stopper ball; it will be on the safety line.
Not all brands use it, but it can be very useful and is recommended for:
- self-landing;
- bar recovery in the water to relaunch the kite;
- self-rescue.
Without it, upon activation of the chicken loop’s quick release, the bar will be free to slide up to the kite, and you will have to spend more time arranging the often tangled lines.
If you use a single bar with the stopper ball for different-sized kites, we recommend adjusting the stopper ball position before entering the water.
The stopper ball must allow the bar to slide a distance ≥ the wingspan of the kite you plan to use or make your life easier by fixing it according to the wingspan of your biggest kite.
Where to place the stopper ball on the safety line correctly?
To determine the correct stopper ball position, simply lay the safety front line next to the leading edge of your kite.
The stopper ball on the front safety line should be placed at least:
- 1 kite wingspan from trim, on bars with the front re-ride system (in LEI and 4-line kites);
- 1 kite rope from the trim, in kites with the 5th line.

What is the other stopper ball you have on the bar between the chicken loop and the trim?
Some bars may also have a stopper ball along the center line (between the chicken loop and the trim), which is used for some old-school freestyle tricks. It can be fixed or slid and limits the upward movement of the bar.
Be careful: this stopper ball may slide down without you noticing, not allowing you to depower the kite; check it periodically.
IKO doesn't recommend that beginners use this stopper ball because, without it, the kite can be easily and completely depowered by simply letting go of the bar.
How often do you test your kitesurf bar safety systems?
Remember that a broken or malfunctioning security system is dangerous, so it is essential to check its proper functioning; otherwise, when you need it, it will not work as it should.
Try the safety systems every time you go kitesurf, it will only take a second, but once you are on the water, you will be sure you have all the safety systems you might need.
Pre-flight check before connecting to the bar:
- Activate the quick release of the leash and close it again
- Connect the kite leash to the front safety line
- Activate the quick release of the chicken loop and close it again
- Aook the chicken loop to the harness and lock it with the chicken finger
- Grab and bring up the floaters on your bar to make sure the lines are in order
In addition, we recommend that you periodically rinse your bar, kite leash, and line cutter with fresh water so that any grains of sand or salt encrustations dissolve, keeping your safety systems 100% efficient.

Do you know what your kitesurf bar is made of?
The kitesurf bar is composed of several elements, all made of materials that are generally very strong and suitable for high stresses.
The bridles and pigtails.
They are made of high-modulus polyethylene fiber with a unidirectional core and braided sleeve. The patent is from Spectra and Dyneema, from which the respective names are derived. This material has high abrasion resistance due to its low coefficient of friction and self-lubricating characteristics. Pulleys can be plastic or metal.

The lines.
They are made of thermoplastic material cast and drawn into fibers. The high-density polyethylene is Dyneema or Spectra, braided at optimized angles to minimize the risk of stretching lines. Heat treatment and brushing optimize the material's inherent properties, while an additional coating protects the lines from UV rays and water absorption, making them buoyant.
The diameter of the lines varies between 1.5 and 2.5 mm, and the breaking strength varies between 180 kg and 300 kg (depending on the quality, diameter, and final seam).
When the kite is in the air, never touch the lines for any reason, even during launch or landing.

The bar.
The bar is in aluminum with a non-slip coating.
You must consider the ratio of the size of your bar to the size of your kite. A large kite has a larger radius of curvature than a small kite. For this reason, the length of the bar, which acts as a lever, should be proportional to the kite's size:
- use a short bar (45 cm or less) with kites smaller than 8 m²;
- use a medium bar (45 to 55 cm) with kites measuring between 8 m² and 12 m²;
- use a long bar (55 cm or more) with kites measuring more than 12 m².
Thanks to a system at the end, many bars can be adjustable and be lengthened or shortened depending on the kite you use and the responsiveness you prefer.
Generally, it's not possible to interchange 2, 4, and 5-line bars and use one bar on different types of kites.
The chicken finger.
It's a rigid rubber tube that ensures the chicken loop stays connected to the hook of your harness.
The chicken loop.
It's a rigid rubber ring that connects the bar to your harness. It's also connected to your kite's front lines. Its connection to the harness allows you to ride without supporting the kite's full traction with your arms.
The chicken loop’s quick release.
The chicken loop’s quick release system allows you to quickly release yourself from the kite's pull in an emergency.

In this regard, some brands have devised a quick and effective release and reattachment system: after operating the safety system and then opening the chicken loop of the bar, to reattach it, simply push the end of the chicken loop into the appropriate slot. No need to touch the release system; the chicken loop also closes with one hand.
The stopper ball.
It's a hard rubber or marine aluminum ball that stops your bar when, for safety reasons, you activate the chicken loop’s quick release, and it slides on the front safety line toward the kite.
The stopper ball position is dynamically settable. It must be calculated to allow the kite to foil and hold itself in an inverted position, minimizing aerodynamic drag.
The swivel.
It's a rotatable component of your bar that keeps the lines from rolling up in the event of a trick, allowing through its rotation to put the front lines back in order, leaving the bar free to slide on the front safety line.

The floaters.
They are made of floating foam and are located on the sides of the bar and make it float.

Simple golden rules.
Follow these simple IKO Standards for your safety on the water and the safety of others:
- Use a bar with a chicken loop with quick release;
- Use a bar with an IKO-approved safety system: front re-ride or 5th line;
- Use a kite leash with the quick release connected to the front of your harness;
- Always keep a line cutter in your harness (in case you need to get rid of lines it could become your first safety system).
These are a few simple rules to follow for safe fun.
Remember that all safety systems should be tested by turning them on and off before each use, so you can be sure they will work when you really need them, and always use a bar that allows your kite to lose all its power.
Have fun and enjoy the wind.
Safety is an important issue in kiteboarding which has been labeled as a dangerous sport. At IKO we strive to provide people with the safest kiteboarding lessons possible using several different methods and equipment. Our Training Department works together with our team of Training Masters* and Examiners to continuously evolve and improve the methods and equipment used.
This interview was conducted with Vincent, who is not only the Head of the IKO Training Department, but also The Training Master who trains other Training Masters! Getting to this position took 20 years of kite experience, around 15 years of being an Instructor and of these 15 years, he has been an Examiner for 8 years. In other words, a tremendous amount of experience and dedication to the sport! This interview will give you all the ins and outs as to why we have set these rules and should be followed by ANY kitesurfing Instructor!
*A Training Master can train Examiners
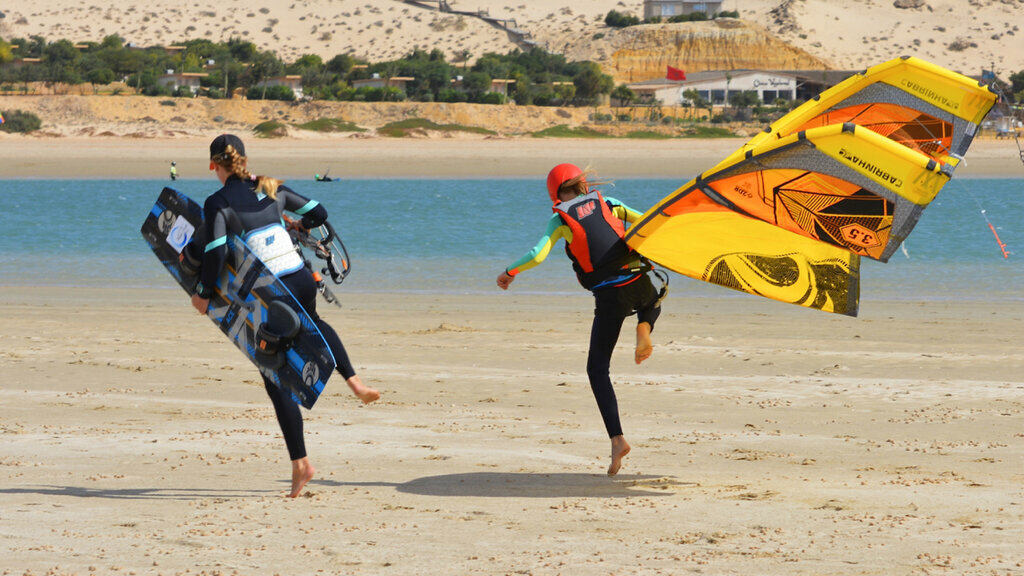
Photo Credit: White Dune Kiting
We require students to be able to swim before they start their kitesurfing lessons, so why do they have to wear a life jacket?
Because kitesurfing is a water-sport where we can go into deep water, you have to be able to swim. However, very few people are able to swim back from a reef that’s 1km out from the shore without problems even if they are in good shape. This is when a life-jacket is very useful.
Students crash occasionally, and in extreme cases, they can get a head injury that causes them to lose consciousness in the water. The life jacket then saves them from drowning.
It’s also highly recommended that students wear an impact vest on land, but this isn’t mandatory, especially if it’s very warm. This provides an extra layer of protection for the chest. It’s also useful to wear the life-jacket on land because thanks to using short lines, a student progresses faster into the discovery level and they’re likely to go into the water in the first lesson. If they don’t have the life-jacket on already and the school is a short walk away, you have to walk and lose valuable time. If the life-jacket is already on, then you can move into the water right away which will make the student happy.
All in all, there’s no downside to wearing a life jacket. It might be a little bit annoying but students must wear a life jacket during their lesson. Always make sure that you have life-jackets for people of all shapes and sizes to ensure that it fits well.
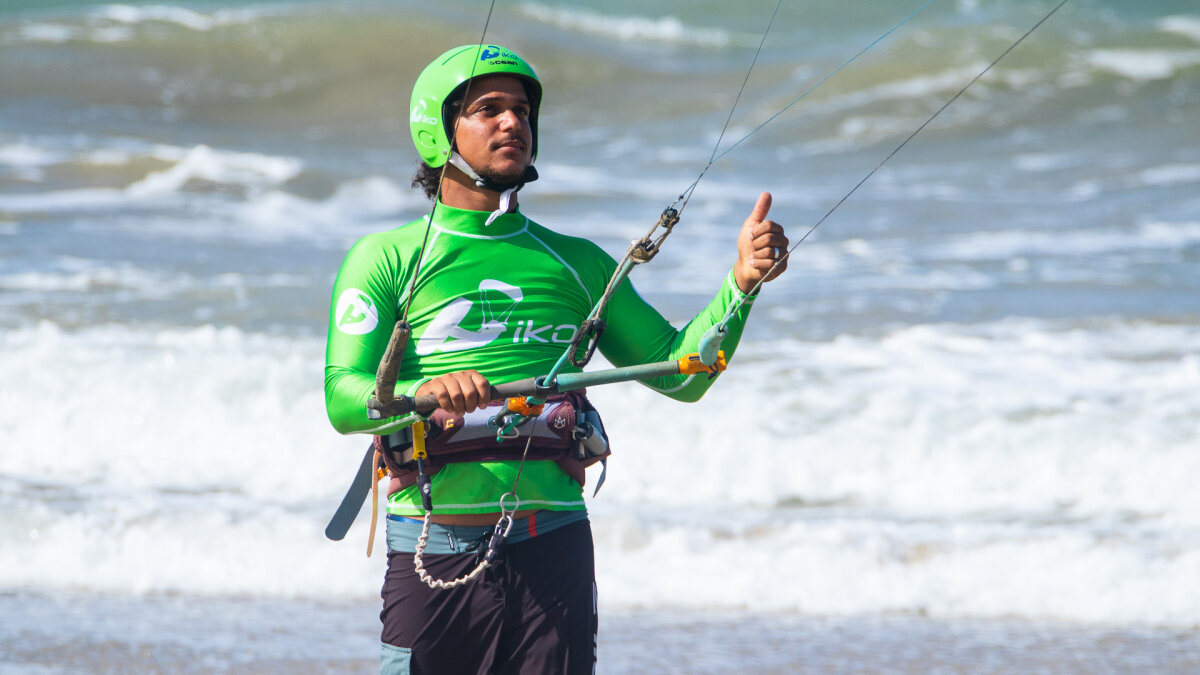
Who must wear a helmet and when should it be worn? Why aren’t helmets mandatory for instructors who are teaching a course or independent riders?
All students at all levels must wear a helmet during their lessons, whether they’re on the beach or in the water. This includes beginner kiters taking a discovery lesson, advanced kiters learning handle passes and candidates taking pro courses.
If a student isn’t wearing a helmet and suffers a head injury during a lesson, the instructor may be found liable if legal action is taken against them. In the end, it’s the responsibility of instructors to keep students safe.
There is no obligation for certified instructors to wear helmets because this is their responsibility, there’s a huge difference between ‘I’m working and I will take the risk of a head injury’ compared ‘I am giving a lesson to someone who doesn’t know the sport and I’m taking the risk of giving my student a head injury because the student didn’t receive a helmet.’
Sometimes people say it’s annoying, yes, it’s a bit annoying. Sometimes people say I don’t want to wear a helmet, but they don’t have a choice because in the end they fall under the responsibility of the instructor and they have to listen to you.
If you see people teaching here on the beach without helmets, do you ever say anything about it?
I try to communicate with them but if they are not IKO then they usually don’t care about IKO and the rules we have set. Of course, I try to explain and talk to them but the people who are most blind are the people who don’t want to see.
We always try and we do see more and more non-IKO Instructors teaching with helmets and life-jackets but there will always be those people that simply don’t care. The IKO is not the police so we cannot regulate this worldwide.
This is also why we are working on becoming more recognized worldwide. For example, we just started working together with the Italian organization that regulates water sports. We hope to start working together with other countries as well so the sport can develop more safely and not have the image that it is a dangerous sport to learn.
Why should my safety leash be attached to the front of the harness?
First of all, the kite will pull you in the direction that it is going from the attachment point. If the leash is attached on the back then it will pull you on your back and you will struggle to release it. However, put it on the front and you will be able to reach it better and thus release it quicker.
Let’s make a comparison to an F-16 or other military aircrafts, in extreme dangerous situations the pilot needs to eject himself from the plane. The button to eject the pilot is between his knees right in front of him where it is easy to reach. If you tell one of these pilots that we put our eject button on our back, they will say that this is stupid because it is more difficult to reach and you could lose some valuable time that could mean the difference between life and death.
Even if you are at the level where you are doing handle-passes, putting the leash on the back of the harness is not an excuse that makes the trick easier to perform. The leash won’t block you or act any differently than when it is attached to the back. But if you happen to run into a problem, you’ll be very happy to be able to release it as quickly as possible.
Luckily, we don’t need to use our safety leash often and really big accidents are relatively rare in the kiteboarding scene, however, the day you do need it and you can’t reach it… Then you’re being dragged through the water on your back, you’re taking in water, you start to panic and the situation gets bad really fast.
Now, some people are putting the leash on the side of the harness, this already makes it more reachable however it’s still not the best option. A situation in which this wouldn’t be the optimal place to have the leash would be when you seriously injure one of your hands/arms/shoulders. Say you injure the arm on the side where you have your leash, this could mean that you are unable to reach your leash with that hand so you need to go around with your other hand to release the leash. This is more time-consuming and a more difficult manoeuvre, again it is possible but will be hard. We need to take all these situations into account because you don’t know when you will need to release your leash.
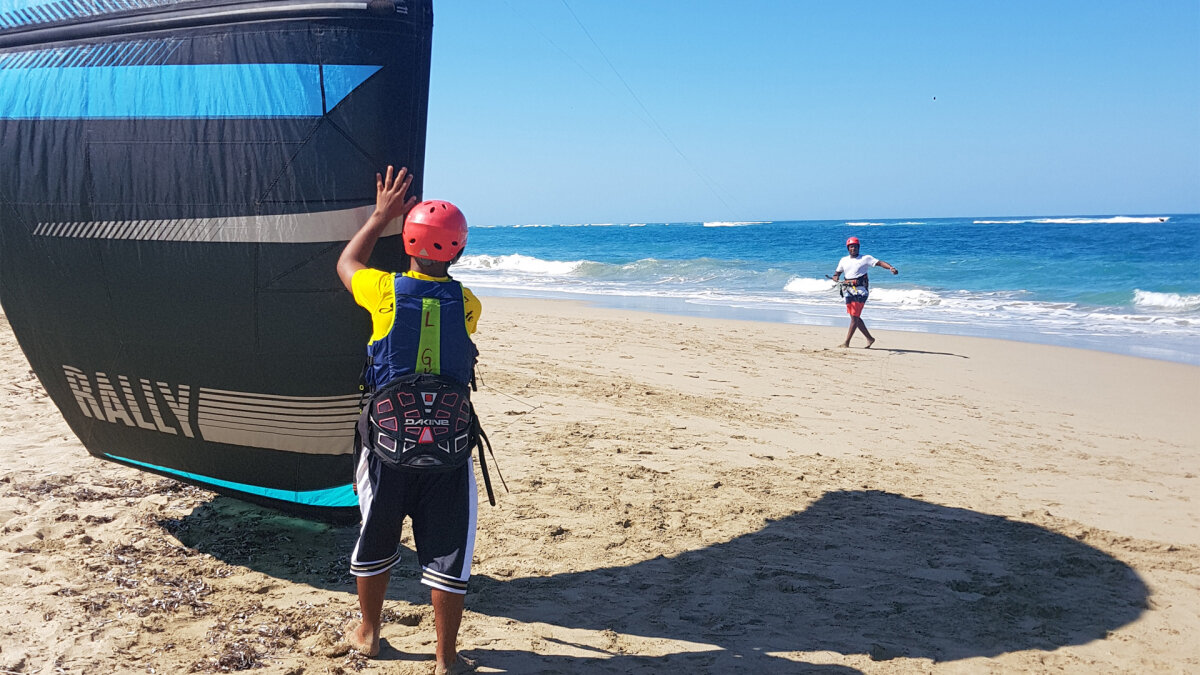
Why is the use of long-lines not recommended?
We are probably the only sport where the students are put on equipment that is meant for independent riders. When you learn how to ski/snowboard, you first start on the green slope and then progress as you gain more experience.
I always take the example of the car. When you are learning to drive you usually use a smaller car that doesn’t have as much power and not a formula one car. This makes sense as you first need to learn to steer the car and be able to stop the car. We do the same with short lines, if you start learning with a formula one then you have too much power from the start and you don’t know how to handle anything. So short lines will help you to do that, the steering is the same, you learn how to use the safety systems and to let go of the bar.
Of course, as soon as the student is able to do this comfortably, we give him the ‘formula one’ and we tell them, basically everything is the same however now you have more power so be careful. The student will understand you, at the beginning the student may not understand because they do not know anything about it. We first want to focus on steering and safety system use and only then give them access to some power.
When using long lines from the start, the student doesn’t know much about kiting yet so you will see them being pulled by the kite or the kite crashing hard, this makes them afraid. When you are afraid, you tend to be more tense which results in the student pulling more on the bar which will in turn create more power and then it’s just downhill from there.
Of course it works, you can learn how to kite on long lines with full power, we all did this a long time ago but on the other hand, using short lines has multiple advantages which are discussed in the next paragraph.
More and more instructors and kite schools are using short lines, what are the benefits for the Instructor and the student?
The first and most important advantage is that the kite’s power is reduced without reducing the size!
When learning on a kite that doesn’t have much power, the stress for both the Instructor and the student is reduced as no one is being pulled around by the kite. This in turn stimulates discovery as they can comfortably explore all areas of the wind window. Additionally, the kite will not crash as hard as it would on long lines which means the kites will need less maintenance and will last longer.
As the student can gradually get used to the power, they will have a better understanding of the power that a kite can have. If the student makes a mistake then this will have less negative impact on the student as the kite won’t have enough power to cause any serious incidents.
Due to the short lines, the size of the wind window is reduced, this means that we need less space for a lesson and as we use less space, we have less negative impact on other beach users. It also means that more lessons can be taught on land at the same time if the spot allows for it.
Less kites will be needed for the lesson, rather than changing the size of the kite, you can adjust the length of the lines. This isn’t only easier to do but also faster meaning the lesson time can be used optimally. A gradual transition to longer lines should be made once the student has demonstrated good kite control.
Photo Credit: Eva Krul
Why should you not hold onto the back of the student’s harness?
It is not forbidden to hold onto the back of the harness but if you’re holding on during the whole lesson, then it is likely that you don’t have confidence in your student. This may be because the lines are too long or because the student is not confident in steering the kite.
You know that therefore the student is in potential danger and you hold onto the harness.
Of course if there is some actual danger or high risk, you can hold onto the student’s harness to ensure the student’s safety. But if you are on trainer lines then the student is less likely to be pulled so it’s not necessary to hold onto the harness.
It’s much better not to hold onto the harness because without holding onto the harness they really learn and become more independent from the start. If you’re teaching and holding onto the back continuously then the student doesn’t get the actual feeling because they have an ‘anchor’ hanging off their back which isn’t the case when you go kiting independently.
It also helps you as an instructor! It will prepare you to teach at a higher level, when you are a Level 2 Instructor you can teach with 2 kites flying at the same time and it’s not possible to hold onto the student’s harness as you cannot be in 2 places at the same time.
I barely touch the student’s harness during my lessons, maybe just a little bit in the beginning or if it is a little kid or someone who is a little bit afraid just to reassure them. But less than 10% of the time.
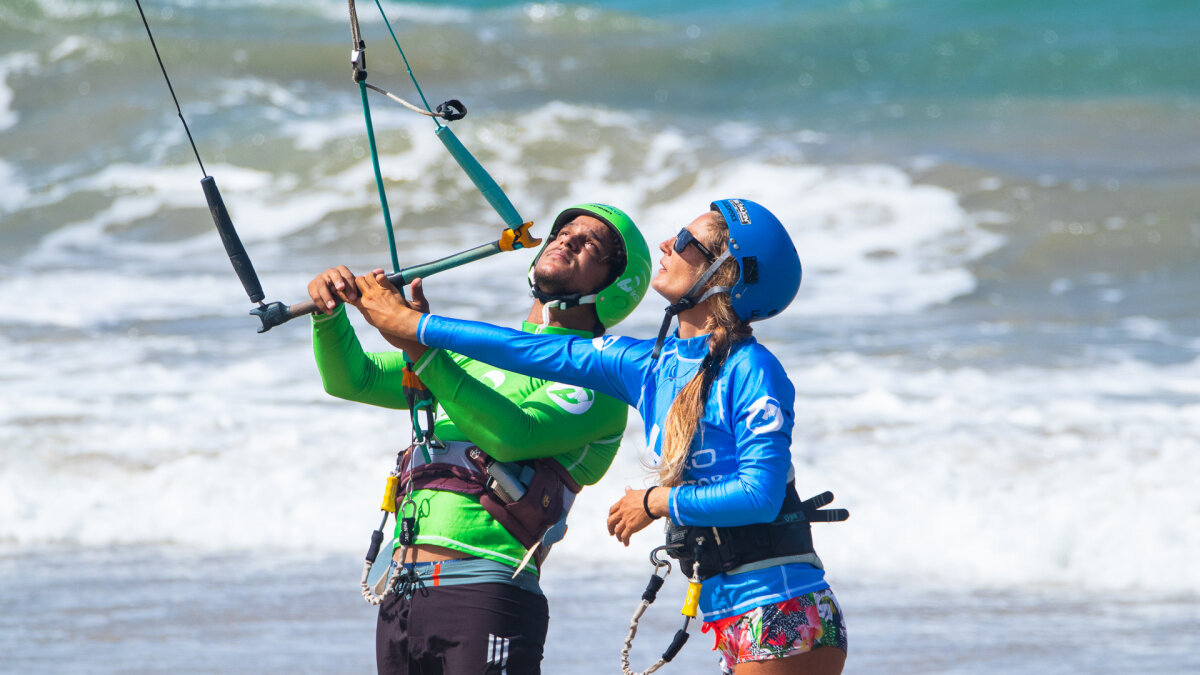
Why should the Instructor not touch the bar of the student?
If they have really poor steering control then you can use the elbow technique and help them as much as they need at the start and decrease how much you have to help as the lesson progresses. They need to become independent. Again it’s really important here to use short lines.
Of course if you’re teaching and you see your student is distracted by something else happening around and doesn’t watch the kite but pulls on the bar then you can help to correct them to avoid any accidents.
If my student is struggling to put the board on their feet, can I help them to put on the board?
It’s always okay to help your student but if you have to help because they are really struggling then it is likely that they are tired and it is best to stop the lesson and continue at another time.
The goal of the lesson is to become independent so always helping the student with their board won’t help them to reach this goal.
There are people that struggle to put on the board for various reasons, but even they need to learn how they can put on their board by themselves. You can discover a way for them to be able to do this during the lesson, for example:
-
You can land the kite in the water on the side of the wind window then put on the board and relaunch the kite.
-
You can tell your student to grab a foot strap rather than the handle in the center of the board
-
You can put the board in front of you and try to shuffle your feet in it until they are comfortable and you are ready for your water start.
This may seem more difficult but the students have to learn how to do this by themselves.
Usually people only spend around 9 hours learning how to kite, this means that in this time they need to learn everything to become independent. If you are always doing everything for them then they won’t learn. Of course if you see your student is getting tired then you can always help them. Just remember that they are paying to learn how to practice this sport and they will want to be able to do everything by themselves at the end of their course.
The more you do as an Instructor, the less they learn.
Why do we have to give priority to all other vessels?
Sailing rules state that the one with most maneuverability has to give right of way, in most cases this is us. People who do both wind and kitesurfing might wonder why we kiters have to give way to the windsurfers, in most cases, the most experienced windsurfer will be less maneuverable than even a newly independent kiter.
It's really easy for us to change tack, do a jibe, in most cases it’s even fun so just be nice.
One exception could be when a kiter is surfing a wave, in this case the windsurfer would have to give way because we are less maneuverable.
Use common sense!
Does a kiter riding starboard tack always have priority?
No, this is a general rule for priority however in many situations it doesn’t apply. For example:
-
If you encounter a kiter surfing a wave on port tack then they would still have priority.
-
If you have spot where you enter the water on port tack then you would still have priority because you are entering the water.
-
If you’re starboard and you want to jump but you have someone coming towards you on port tack, then you would still have to wait as you have to have some free space around you.
-
If someone is body-dragging then they have priority because they are less maneuverable.
Overall if you see a rider that is not following the row rules then it’s better to just move away and give them their space rather than almost have or have an accident with them.
Thank you Vincent for clarifying all these different safety issues for us! We wish you all many safe kitesessions.
*Credits to H2O Extreme for the cover photo.
Dear Instructors and IKO Centers, we hope the current season is bringing you lots of wind! Here is the latest news for IKO Pros, which we invite you to read carefully.
New Posters Following the Changes to the Student Certification Standards
Instructors and Centers, please pay close attention to these changes because they will impact the certification of your students:
- “Jump transition” has been moved forward in the Level 4 (but also stays in the Level 5 Freeride). This means that Assistant Instructors and especially Instructor candidates now need to be able to perform jump transitions in order to pass the ITC Riding test.
- “Controlled stop” previously was at the Level 3J and is now at Level 2I. This means it should be taught along with the water-start (in other words, we teach them to start and stop at the same level).
- “Launch and land as an assistant” has been moved from the Level 1C to Level 1B.
- The rest of the changes are mainly rewordings to make it simpler and easier to translate.
Updates to the IKO Standards and to the Chart of Sanctions
In our constant efforts to increase the quality of the IKO, we recently made some changes to the Standards and the Chart of sanctions. If you have not looked at these documents for a while, now is a good time to make sure you are up to date!
- (Article 36) IKO Instructors Level 3 can now be requested by the head office to administer SCC (School Compliance Check) for Centers and Instructors or do so by their own initiative (in which case the head office must be informed).
- (Article 55) Examiner Candidates need to have run a minimum of 8 AITCs with a total of at least 30 candidates as a prerequisite.
- We added new entries and made some changes that concern Assistant Instructors to Training Masters in the Chart of sanctions.
Your Students Are Requesting Their Certification to IKO!
This year, already more than 1200 students sent a certification request to the IKO because they were never certified by their Instructor or Center. This represents an increase of more than 200% compared to 2018 which shows that your students are more and more aware of the IKO Certification and expect to be certified at the end of their last lesson.
The certification of your students is one of the most important responsibilities you have as an IKO Instructor. It allows your students to access their own vCard, which helps them better assess their riding level, realize how far they progressed and understand their limits and potential at the end of their kiteboarding lessons.
To encourage Instructors and Centers to certify their students on time, the certification credits will soon be valid for one year from the date of purchase (starting in 2020). You can buy credits in packages of 10, 25 or 50 according to your needs and the credits you don’t end up using can be transferred to other instructors.
Do you have the Plus or Premium Instructor membership? If so, your plan already includes 5 or 40 credits and you benefit from an IKO shop discount of 10% or 20% on the entire online store (also applicable on the purchase of credits).
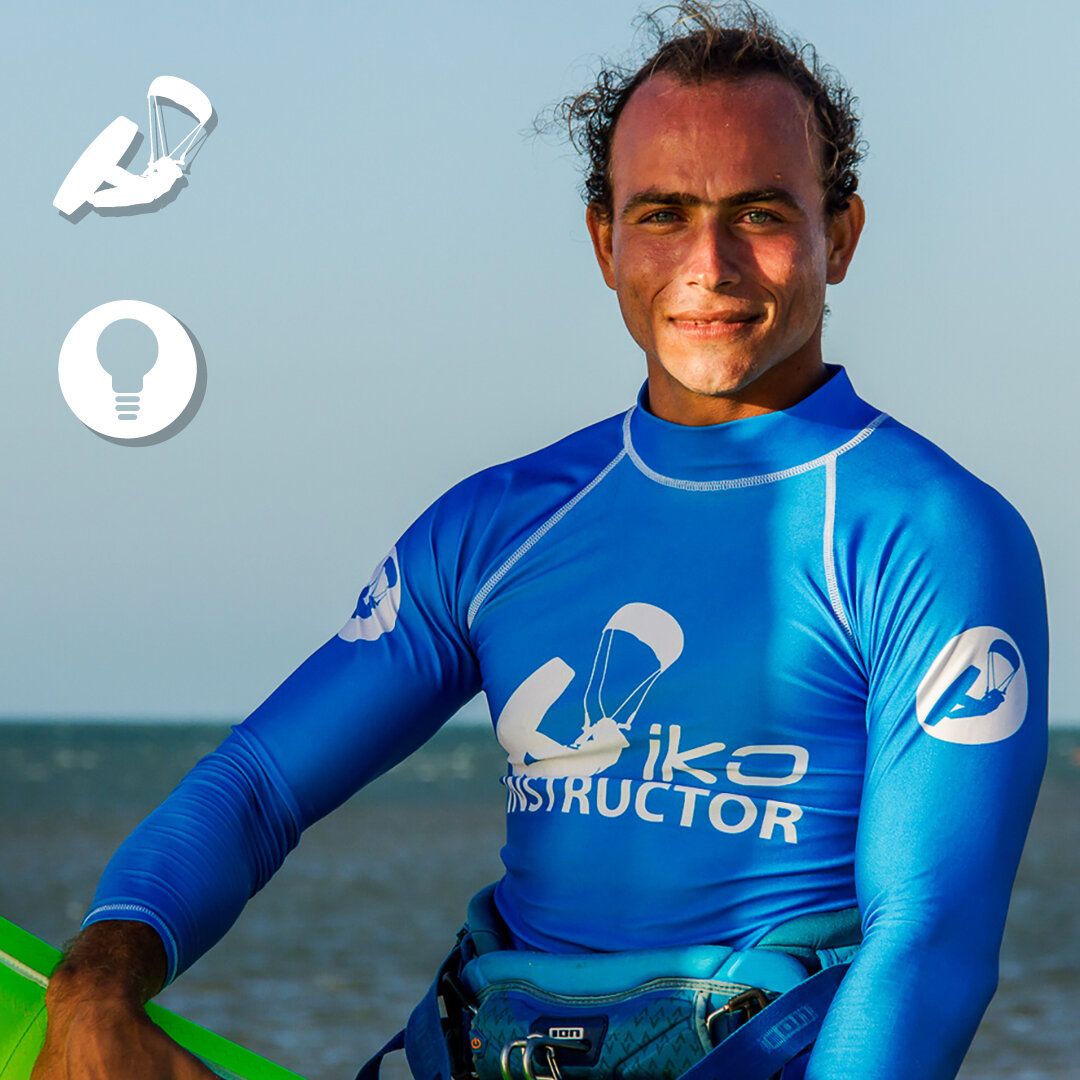
No matter what you are training, when you are with an Instructor you expect them to keep safety at all times in regards to whatever you are doing; right? Unfortunately, sometimes there is no way to tell if your Instructor is doing so! Luckily in kiteboarding though - you can!
Kiteboarding is one of the worlds most wonderful sports though it is also one of the world's most extreme sports. Below are five ways to tell your Instructor is taking your safety into consideration:
1. Your Instructor will introduce himself and evaluate your level
Your Instructor will ask you what you can and can’t do. He will also ask you whether you have an apprehension of water so he can adapt the lesson according to your knowledge and goals.
2. Your Instructor will set the objectives of the course
Your Instructor will explain the goals of the course with the exercises you will be asked to do. The Instructor will explain and safely instruct you how to achieve them. All this is part of the IKO step-by-step learning method to maximize your progression with safety and fun.
3. Your Instructor will provide you a helmet
This is mandatory for your safety no matter the weather conditions, the spot organization, and your level.
4. Your Instructor will provide you a buoyancy aid
Even if you know how to swim, this is another mandatory protection that any student must wear, even in shallow water! Double check that the buoyancy is at least 50 Newton.
5. Your Instructor holds a Valid IKO Certification
You can check it online by his name - ID # and/or he can show you his certification on his IKO app.
These five signs and steps will help ensure you are in good hands. Stay safe and have fun when going kiteboarding!
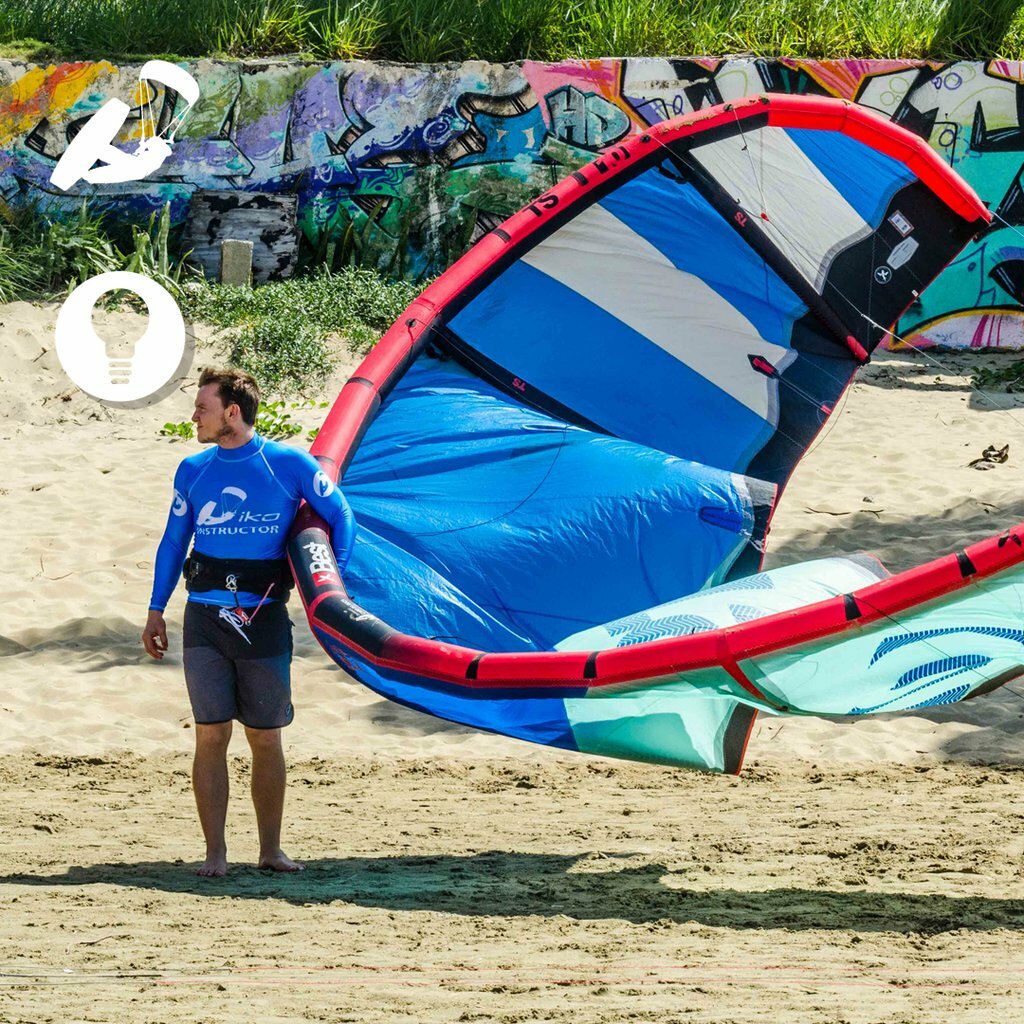
Where is your leash positioned on your harness right now? If you have yet to move your leash to the front of your harness, go do that now before continuing to read any further. Over the last months we have been pushing and reminding Instructors as well as kiteboarders about this easy and important safety change.
Instead of using a leash on your back or sides it is best to attach it directly in the front. This makes your leash accessible to both hands at all times whether to hook in or release during an emergency.
If you are one of the kiteboarders with a long leash, you can now consider changing your leash for comfort and accessibility. Having a long leash does not make sense for anyone other than those practicing unhook wakestyle. If you are a beginner, wave rider or cruiser there is no need to have a long leash. Nowadays most brands will have a short leash option available.
What is great about this safety improvement is that many brands and companies have realized the safety benefits and altered their designs according to this. Creating simple ways to attach one's leash to the front and supplying short leashes with bars instead of long ones.
If you have yet to change your leash position on your harness or its length - do not wait any longer or until an accident. Do it now, you won’t regret it!
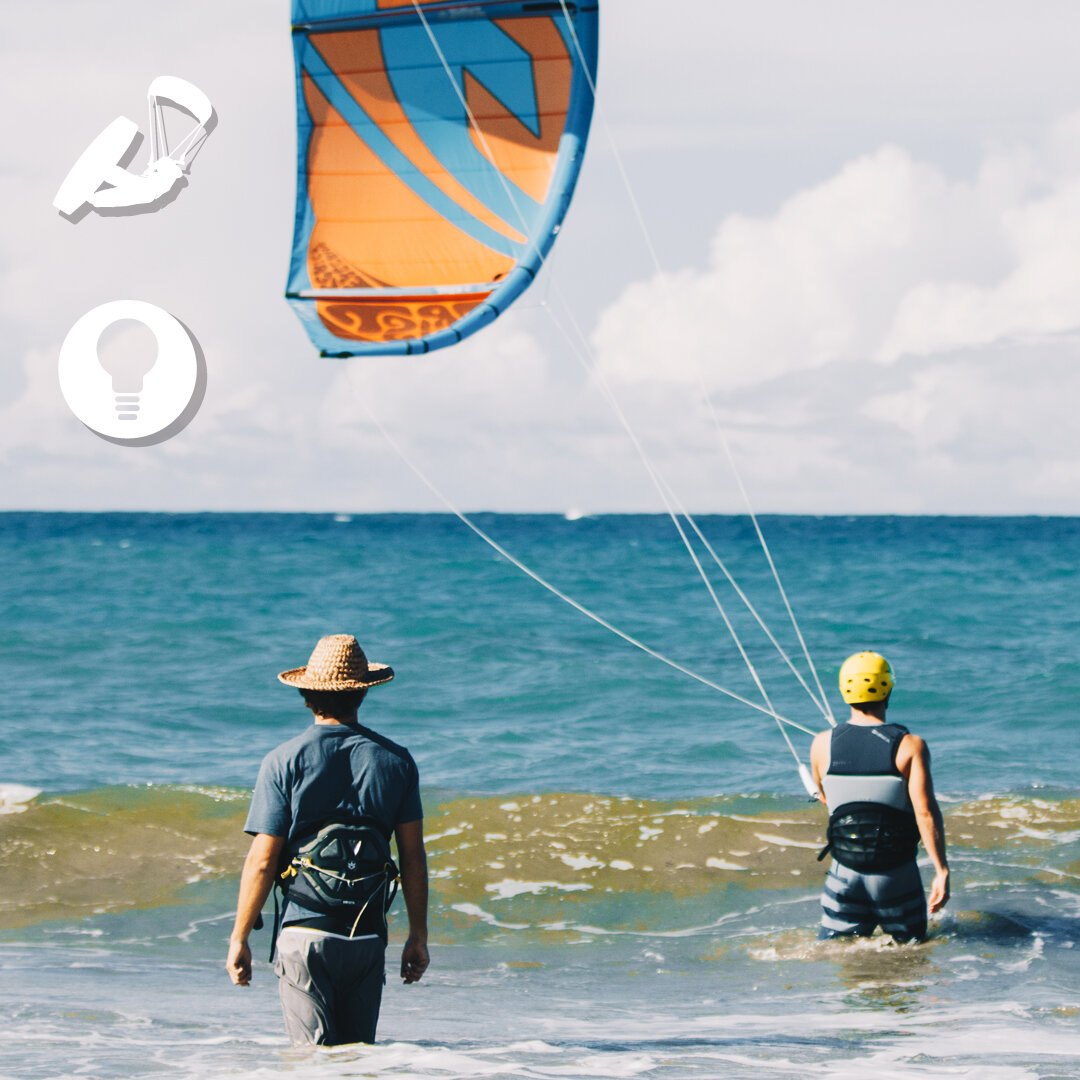
If you have ever passed by an IKO Center you probably have realized that kiteboarders in the beginning stages are using very short lines. The IKO Professional Community for many years has been implementing and using this simple yet highly effective adjustment in their teaching programs.
When we are talking “short lines” we are talking 5m. The 5m lines can be used in the beginning up into body dragging and steady pull. This method reduces the stress of both the student and the Instructor. Allowing the Instructor to be closer to the student and reducing mistakes to have less negative consequences physically and mentally on the student. The short lines reduces the size of the wind window, thus reducing the space needed for a lesson and negative impact on other beach users.
The short line method stimulates positive discovery urges in students. As you can reduce the kite’s power. This means you can have a 4-line LEI kite flying without power and it can be considered a trainer kite according to IKO Standards. Easily managing stronger and gusty wind conditions.
When using shorting lines, kite crashes are also much softer; causing less damage to the equipment. Additionally with short lines, it is nearly impossible to loop the kite. When using short lines it reduces the amount of time spent on equipment management*, (one kite and different line lengths) according to the student’s level, weight and weather condition.
As an example of a courses in normal wind condition would go as followed:
5m lines for discovery level until the student has good control of the kite in all part of the WW and know how and when to use the safety system. (5m lines can also be used in the body drags and steady pull)
10/12m lines for intermediate level until the first attempts of the water start
20/22m lines for water start and riding
What are your thoughts and experience on short lines? Do you prefer this method over using a small foil/trainer kite and then moving to long lines? Let us know your personal and professional experience below both from the Instructor and Student point of view.
*It is easier and faster to change the length of the lines than to change a kite. You should make a gradual transition to longer lines when the student has demonstrated good control using the shorter lines and you need to move on to other exercises that require more power in the kite.
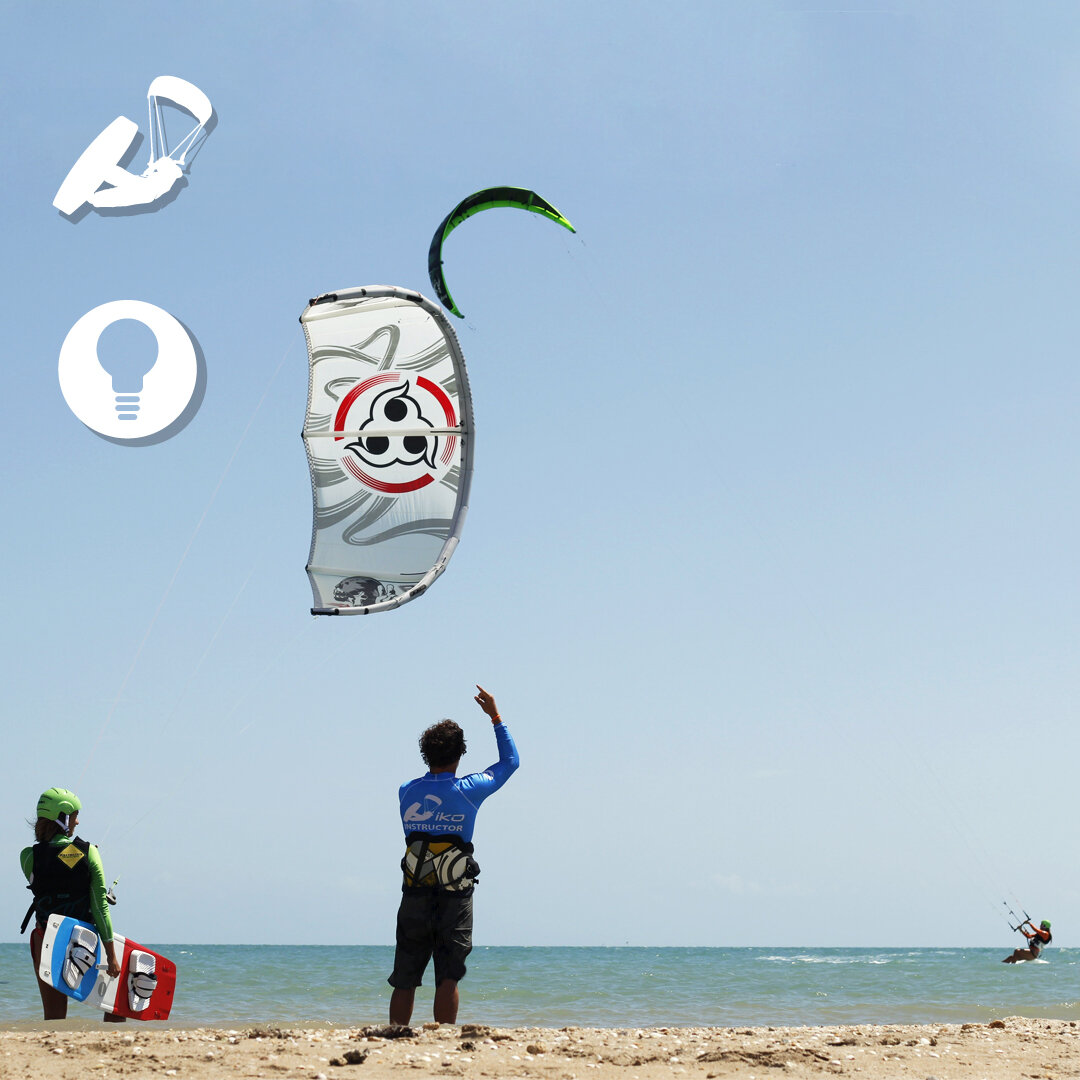
You are just starting out, know how to ride though you have yet to learn the rules of the sea; don't worry- that will change forever today.
There is no doubt that kiteboarding is still in its infancy stages and growing rapidly. Kiteboarding locations like Cabarete that use to have 10 kiters out at sea now have hundreds, and without rules- these crowded waters can quickly become hazardous. Proper kiteboarding manner not only makes it easier to navigate in crowded waters; it makes this extreme sport much safer overall. A kiteboarder who does not respect the right of way rules is an irresponsible and dangerous kiter and no one really wants to be that person.
Now you must be wondering, what is proper kiteboarding manners? It is quite simply a set of 8 rules. To help maintain clarity we will list the rules in a clear list.
Golden Rule:
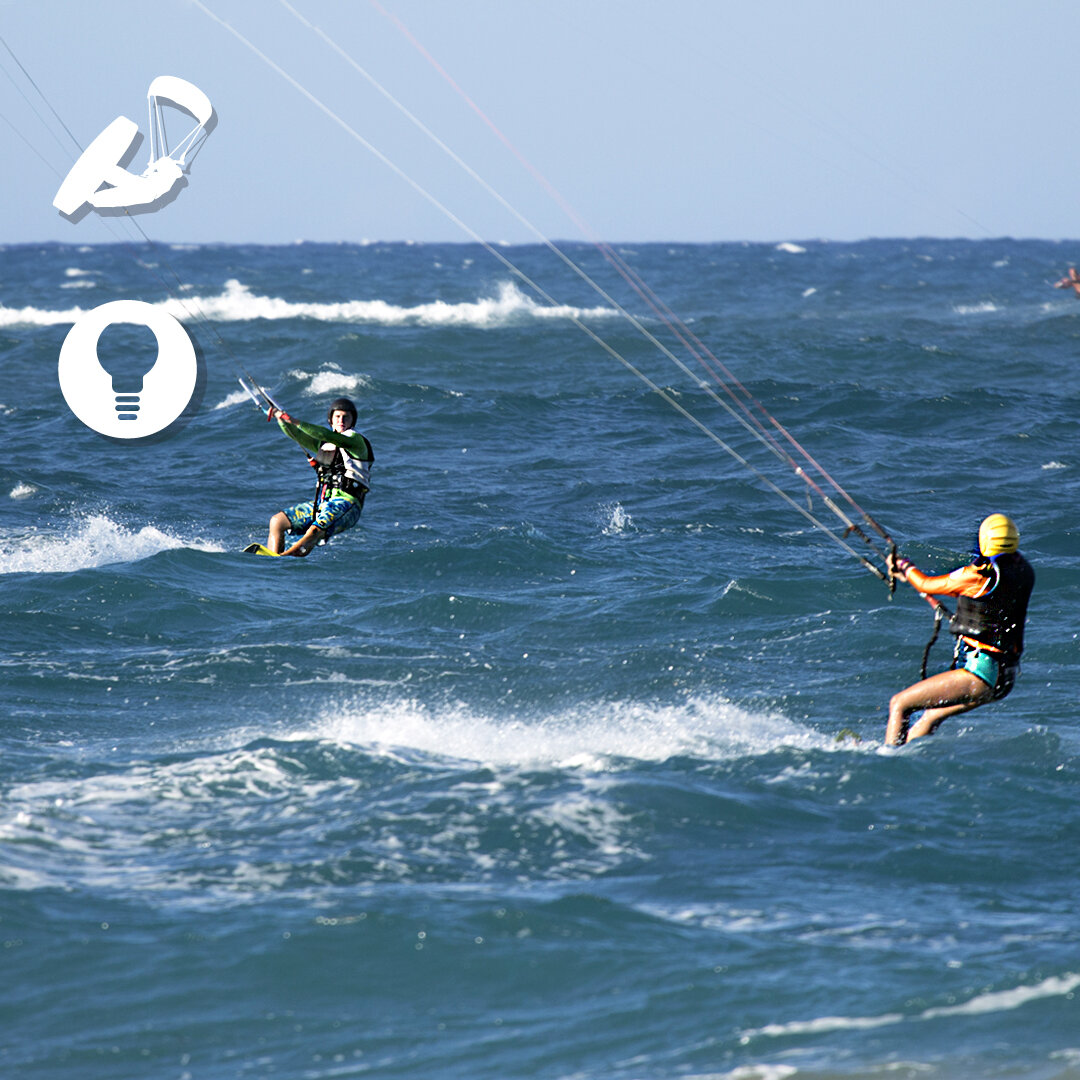
If you are passing upwind, keep your kite HIGH.
If you are passing downwind, keep your kite LOW.
Rule #1: The rider entering the water from the beach has right of way over the incoming rider.
Rule #2: Starboard rider (kite on the right-hand side) has priority over the oncoming rider and should keep his course, speed and heading to allow the other rider to avoid him.
Rule #3: When two riders are traveling in the same direction, the faster rider must give way to the slower rider in front.
Rule #4: The rider surfing a wave has priority over the one who is jumping or going in the opposite direction.
Rule #5: Right of way must be given to other ocean and beach users. Kiteboarder must travel downwind of them.
Rule #6: To jump, a kiteboarder must have a clear safety zone of 50m downwind and 30m upwind.
Rule #7: When two kiteboarder are on land at the same time, one kiter is preparing to enter in the water and the other one is ready to land, both proceed and keep clear from each other.
If you follow these 8 rules above, you will be a responsible kiter. Some kiters have never learnt proper kite manners and others have never learned them. No matter what, now you know the rules!
Tag a friend below who needs a refresher on the 8 rules one must follow to be a responsible kiteboarder!
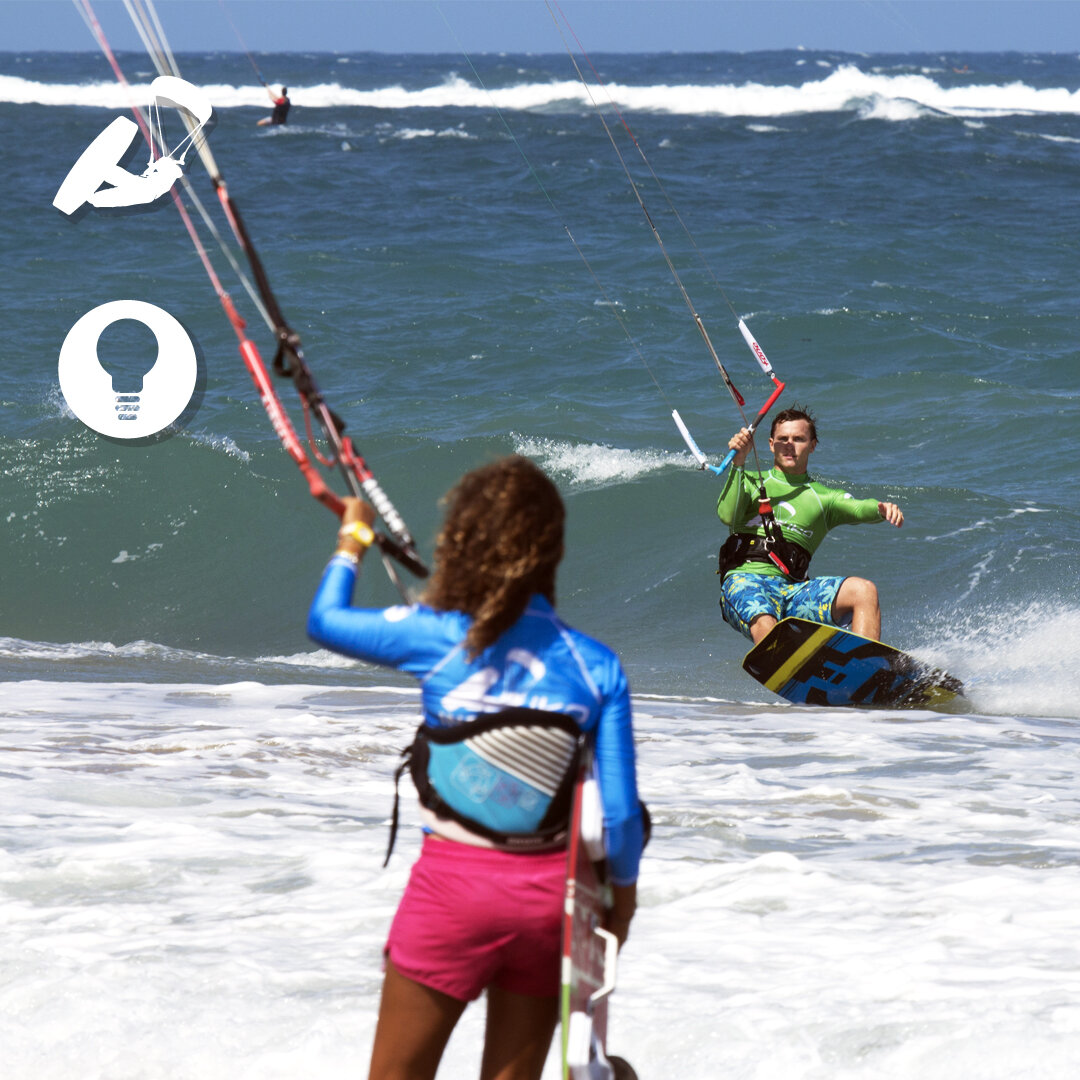
As you learn to kiteboard, you will be taught the few right of way rules that help keep kiters organized and safe out on the water. The golden rule for when one rider is upwind and the other rider is downwind is that, if you are passing upwind, keep your kite high. If you are passing downwind, keep your kite low.
This will ensure maximum distance between the kites when crossing to prevent any possible entanglement.
There are 8 priority rules in total, do you know all of them? List them in the comment section below-
Note: In the photo you will realize the rider on the right lowers his kite as much as possible as he passes downwind, while the upwind rider (on the left) flies her kite as high as possible.
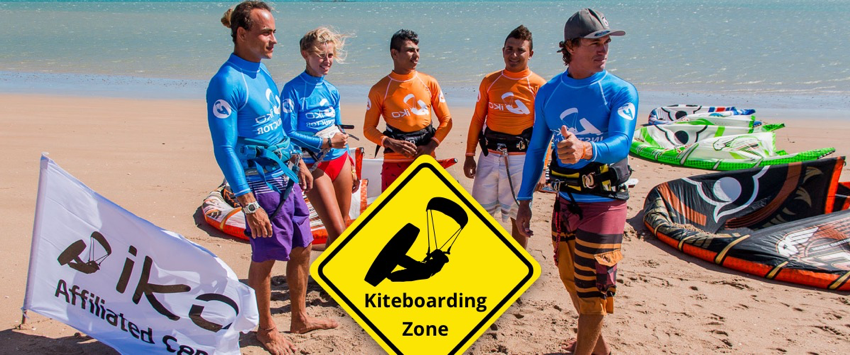
To maintain the quality within the IKO growing community, we have updated the logo policy and developed a non-competitive policy. This is so IKO Centers and valid IKO Instructors can be clearly identified from other schools and the general public. Additionally, we have updated the IKO program to follow the evolution of the sport and developed more career opportunities from the beginning of Instructor Level 1.
How Can the IKO Name or Logo be used?
The IKO brand is recognized worldwide and associated with quality teaching programs.
IKO valid Instructors can use the IKO Name to value their qualifications. However, any business including a school hiring an IKO Instructor or an independent Instructor selling IKO courses must be affiliated as IKO Center to be able to use IKO name or logo.
If you ever see a school promoting itself with IKO name without to be properly listed as an IKO Center please fill a claim. As a community, we can properly maintain a high-quality service and brand name
More benefit from the IKO Instructors Level 1 certification
As time passes and we work to improve the progression, we have made few adjustments to improve the progression of IKO Instructorship. IKO Instructors Level 1 now have access to Coach Courses and the possibility to teach kiteboarders up to Level 4 (Advanced).
Instructors looking to become Coaches will now have to demonstrate successful riding skills in one or more of the Evolution categories; freeride, freestyle, wave riding and/or NEW hydrofoil. They will then be able to teach kiteboarding up to Level 5 (Evolution) for the discipline they have been certified in. The hydrofoil discipline proves to have high demand worldwide and is a great specialty to be able to teach.
Covenant not to compete against IKO
We believe competition helps to improve quality and kiters are free to choose their organization. Becoming an IKO member means to respect the organization you are part of.
The member and Center statuses created by IKO should not be used in favor of other organizations to compete against IKO and its members. Current IKO Centers and IKO Instructors that are respectively organizing or running and certifying Pro Training Courses for other organizations are invited to choose between IKO or the other organization. This helps new candidates to choose and compare better between organizations. IKO welcomes Instructors from different organizations through the IEC program since 2001 and can be part of IKO anytime.
Your Claims and Feedback contribute to Quality
By following and enforcing the IKO Standards you directly help strengthen the IKO Name on an international level. We have now added more resources to improve how quickly questions and claims are responded to. With the quality feedback form, the Quality Department can now quickly get on cases that arise. It is important to make claims as soon as they arise as claims that are over 3 months old are not considered valid.
The importance of staying updated, recommending your ideas, reporting unsafe practice is paramount. The effort to maintain a high-quality training program and brand name heavily relies on the community. Together we can continue to safely grow and develop the sport-
Windy Regards,
IKO
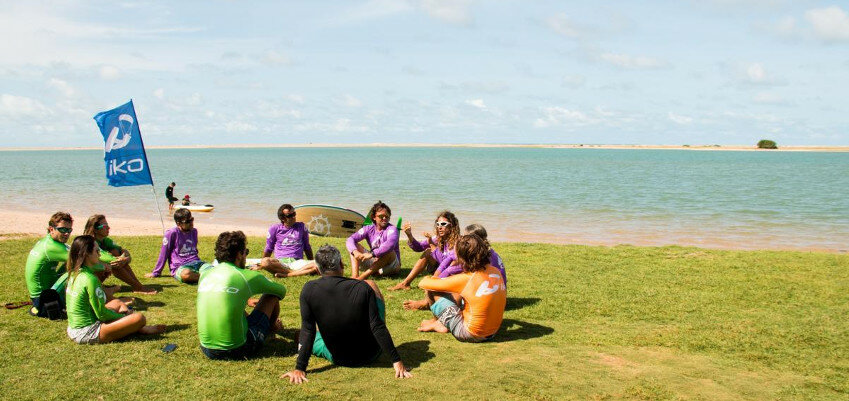
New Organizer Guide now available!
The AITC, ITC, and Coach Organizer Guides are now combined into one guide. All charts with the incomes and expenses are clearly visible, as well as the organizer task list before, during and after the training. This will help Centers to stay organized.
Quality is everything. To ensure the Assistant and Instructor candidates are trained properly, it is important they receive the course content in color (exception are made only where it is costly or not possible). IKO will verify that the guides are printed in color by the feedback sent from the candidates at the end of the course.
To control and improve the quality of the Assistant Trainer course, only ONE Assistant Trainer can be trained during an Assistant Trainer course, given there is at least 2 Assistant candidates. The Assistant Trainer course is no longer the responsibility of the school. Assistant Trainers need to contact the IKO to schedule their course. It is highly recommended to follow an AITC as an observer before doing the real ATTC. Expect this procedure to become mandatory before the end of 2018.
Assistant Course
The AITC-Plus will be renamed and simplified to AITC. We will push that all websites will be updated accordingly. This course has been a major success of the IKO in 2017. Many candidates have provided positives feedback about it. We are now working to update the manual with the feedback we have received from both Candidates and the Examiner team. We plan to release an updated version in Spring 2018.
Note that now Assistant candidates are required to be a kiteboarder Level 4 or equivalent instead of being level 3N. This will help candidates be better prepared for the course.
Instructor Course
Printed copies of the kiteboarder handbooks are no longer included in the ITC pack. The handbook are now available free for all Instructors with a valid membership as eBook on the IKO app. ITC candidates will now receive IKO merchandise and 5 certification credits after their course. Certification cards will disappear as Virtual Card (Vcard) on the IKO App will become more popular. Instructor Level 1 can now teach up to the kiteboarder Level 4 and certify their students online.
Final update and reminder
During pro courses, every candidates must wear a helmet during beach exercises/workshops/teaching practices as well as a buoyancy aid when in the water. Additionally, remember that every Assistant Instructor, Instructor, Assistant Trainer and Examiner must also connect their leash to the front/side part of their harness at all times. This is a global effort to give the proper image and example to current and future students.
Thank you for reading and understanding,
If any questions please do not hesitate to contact us,
Windy Regards,
IKO
During the last months we have been working to ease accessibility and flow when registering your kite center, offering more front and backend services to existing and new schools as well upgraded the IKO Standards across the board. Read this email carefully and do not hesitate to contact us if you have any questions.

Easy Affiliation-
The school affiliation form has been translated into six popular languages; Portuguese, Spanish, Italian, German, French and English. The form itself has been simplified and is easier than ever to fill out. Compulsory boat requirement for Centers has been removed in some spots when schools can prove that the spot security is organized in a different way. We also released a free affiliation plan to help schools and independent Instructors begin the process with IKO. The primary requirement to register is having a valid insurance for the kiteboarding center.
There are many benefits you obtain once you affiliate your school which includes, though not limited to: The right to use the IKO logo and to advertise as an IKO Center which raises your school’s credibility and value proposition; additionally you can certify your students as they learn, and the perk of boosting your school in online presence due to IKO’s reach online. To top it all, this entry level affiliation is quick, easy and free!
Affiliate your center now
Improved SEO for your IKO Center
This past month we have done some backend changes that will help increase your school's online presence. Additions in country + location to your IKO Center’s URL will help your center be found online. We highly recommend fully completing your IKO profile and asking us for help if needed.
Don’t forget to upload new HD photos to your gallery to give a glimpse into your IKO Center to future students and Instructors!
Update your IKO Center information now
IKO Center Back-End Services Improve-
As an IKO Center, you can now certify students directly on your profile. When hosting Pro Courses, individuals can reserve their spot directly on the website and manage the rest of their booking and payment directly with your Center. Make sure when planning a pro course to check your school profile to see the message from potential candidates.
We are also now working on implementing a new feedback system for IKO Centers to Instructor. We would like to know what rating criteria as a Center would you like to have for your Instructors?
Read how to follow up your bookings
IKO Quality Control Efforts Continue Internationally
Over the years we have encountered and handled many cases of IKO imposters; they have harmed the image of quality across all IKO Centers and Instructors. As a community, we found this unacceptable and have decided to work together to ensure the safe growth and development of the sport. We are now taking new measures coming into effect in January to improve and control the high-quality standard internationally.
Beginning 1st of January 2018, any IKO Instructors that are teaching independently and promoting themselves as a business must register themselves as a business to continue using the IKO name and logos. Any Instructor who is independent and not registered as business risks being sanctioned and issues with the DMCA.
This quality standard update will be an effort to maintain the quality internationally for both IKO Centers and Independent IKO Instructors. Whether you are a Center or Independent you will need valid insurance, up to date IKO status and access to either a boat or safety unit if it applies to your spot.
We have made a free affiliation for both centers and independent Instructors which can be found here. We highly recommend you fill out your affiliation form sooner rather than later to avoid issues.
If you have any questions, comments or recommendations please email us back here.
Windy Regards,
IKO
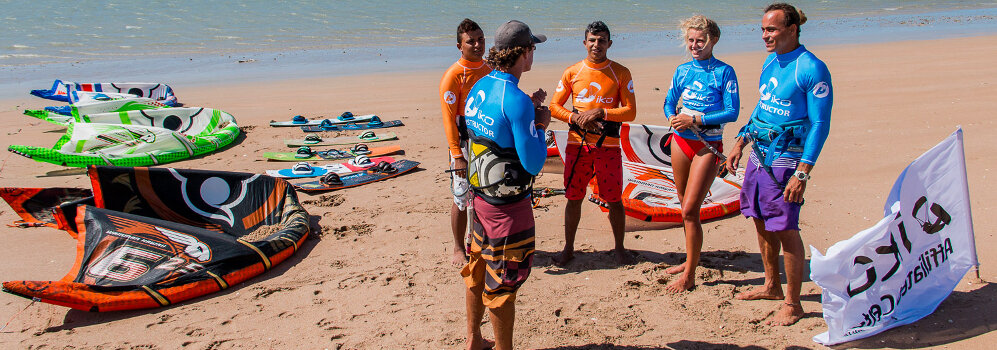
School Requirements Revised
-
6 months extension for the Instructor L1 to become L2.
-
Basic general liability insurance certificate including or not Kitesurfing activities according to the country your school is located in.
New great advantages for each School membership
All pro trainings are run exclusively in your school including the new Assistant Instructor Training Course Plus (AITC-Plus).

- School affiliation – special cases - See Article 9
- General liability accepted in some specific countries like Brazil, Mexico and more.
- Rescue boat from third party accepted and rescue boat not required in some location after approval of IKO training department.
- Become Instructor Level 2 with at least 35 students/280 teaching hours - See Article 24
- Become Instructor Level 2 Senior with at least 100 students/800 teaching hours. -See Article 29
- Become Coach through 5-day Coach Course - See Article 35
- Instructors expired for up to 2 years can attend an Instructor Equivalency Course (IEC) - See Article 57
- Introducing new 5-day Assistant Instructor Course (AITC Plus) - See Article 19
- Instructor Level 2 Senior renamed Instructor Level 3 - See Article 28
- New 5-day Assistant Trainer Training Course (ATTC) that qualifies new Assistant Trainer to train up to 8 Assistant candidates simultaneously - See Article 43
| Contact IKO | |
 |
Call us |
| Our office team is available from 12:00 p.m to 5:00 p.m and 6:00 p.m to 8:30 p.m UTC/GMT. +1(809) 5719530 |
|
 |
Email us |
| Not found your answer from the FAQs? We experience high volume requests, however we will do our best to answer as soon as possible. |
|
| Contact IKO | |
 |
Call us |
| Our office team is available from 12:00 p.m to 5:00 p.m and 6:00 p.m to 8:30 p.m UTC/GMT. +1(809) 5719530 |
|
 |
Email us |
| Not found your answer from the FAQs? We experience high volume requests, however we will do our best to answer as soon as possible. |
|
.png)

